


Today, I’m sharing Part 1 of Indoor Lighting 101! In this first installment, we’ll be talking about how to find and manipulate light in your home. Stay tuned for parts 2 and 3, where we’ll dive deeper into my indoor lighting photography tips and techniques.
In these intro tutorials, you won’t need a fancy camera or gear – just your iPhone and a few household items will do just fine! Every example photo in this blog post was taken with my iPhone XS.
Part 1: How to find & manipulate natural light (you’re here!)
Part 2: How to get a natural light look without natural light
Part 3: How to edit bad light
IGTV
You can watch the IGTV video here. If you prefer blog posts, read on – I’ve noted everything that I talk about in the video here.
https://www.instagram.com/tv/B-dakCxDqcD/?utm_source=ig_web_copy_link
Good light vs. bad light
What is good light, and why is it important?
You’ve probably seen photos of yourself where you’re like, “oh dang, I look good!”
In contrast, you’ve probably also seen photos of yourself where you think, “oh man, I look tired.” See this example of me:
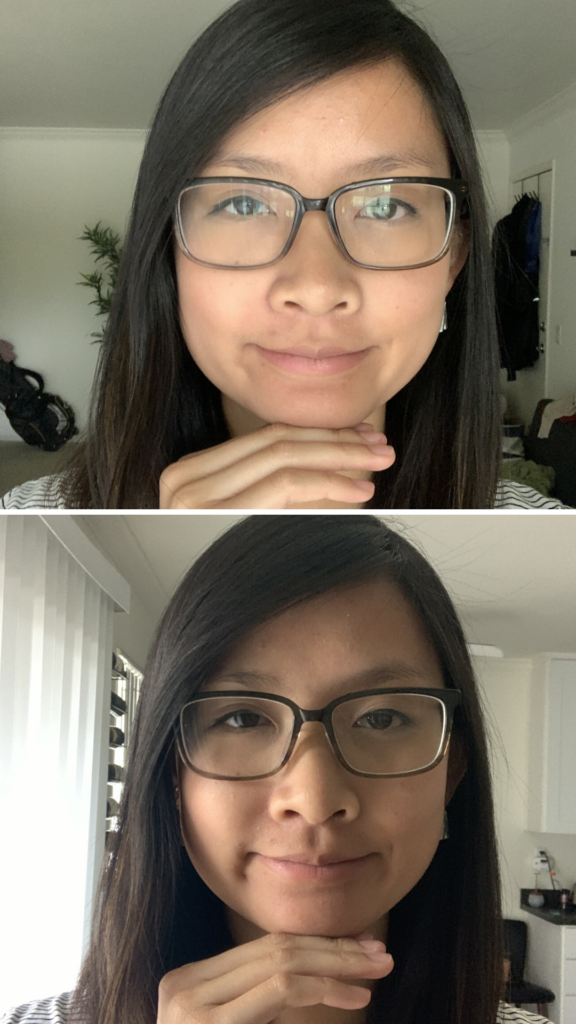
The only difference in these two photos is the lighting. I didn’t edit or alter these in any way.
3 characteristics of good light
When I’m out on a shoot looking for good lighting, there are 3 things that I look for.
- Good light is even and doesn’t cast shadows on your face. Bad lighting will cast shadows, and it will accentuate any blemishes or uneven skin tones. It’s also distracting in photos.
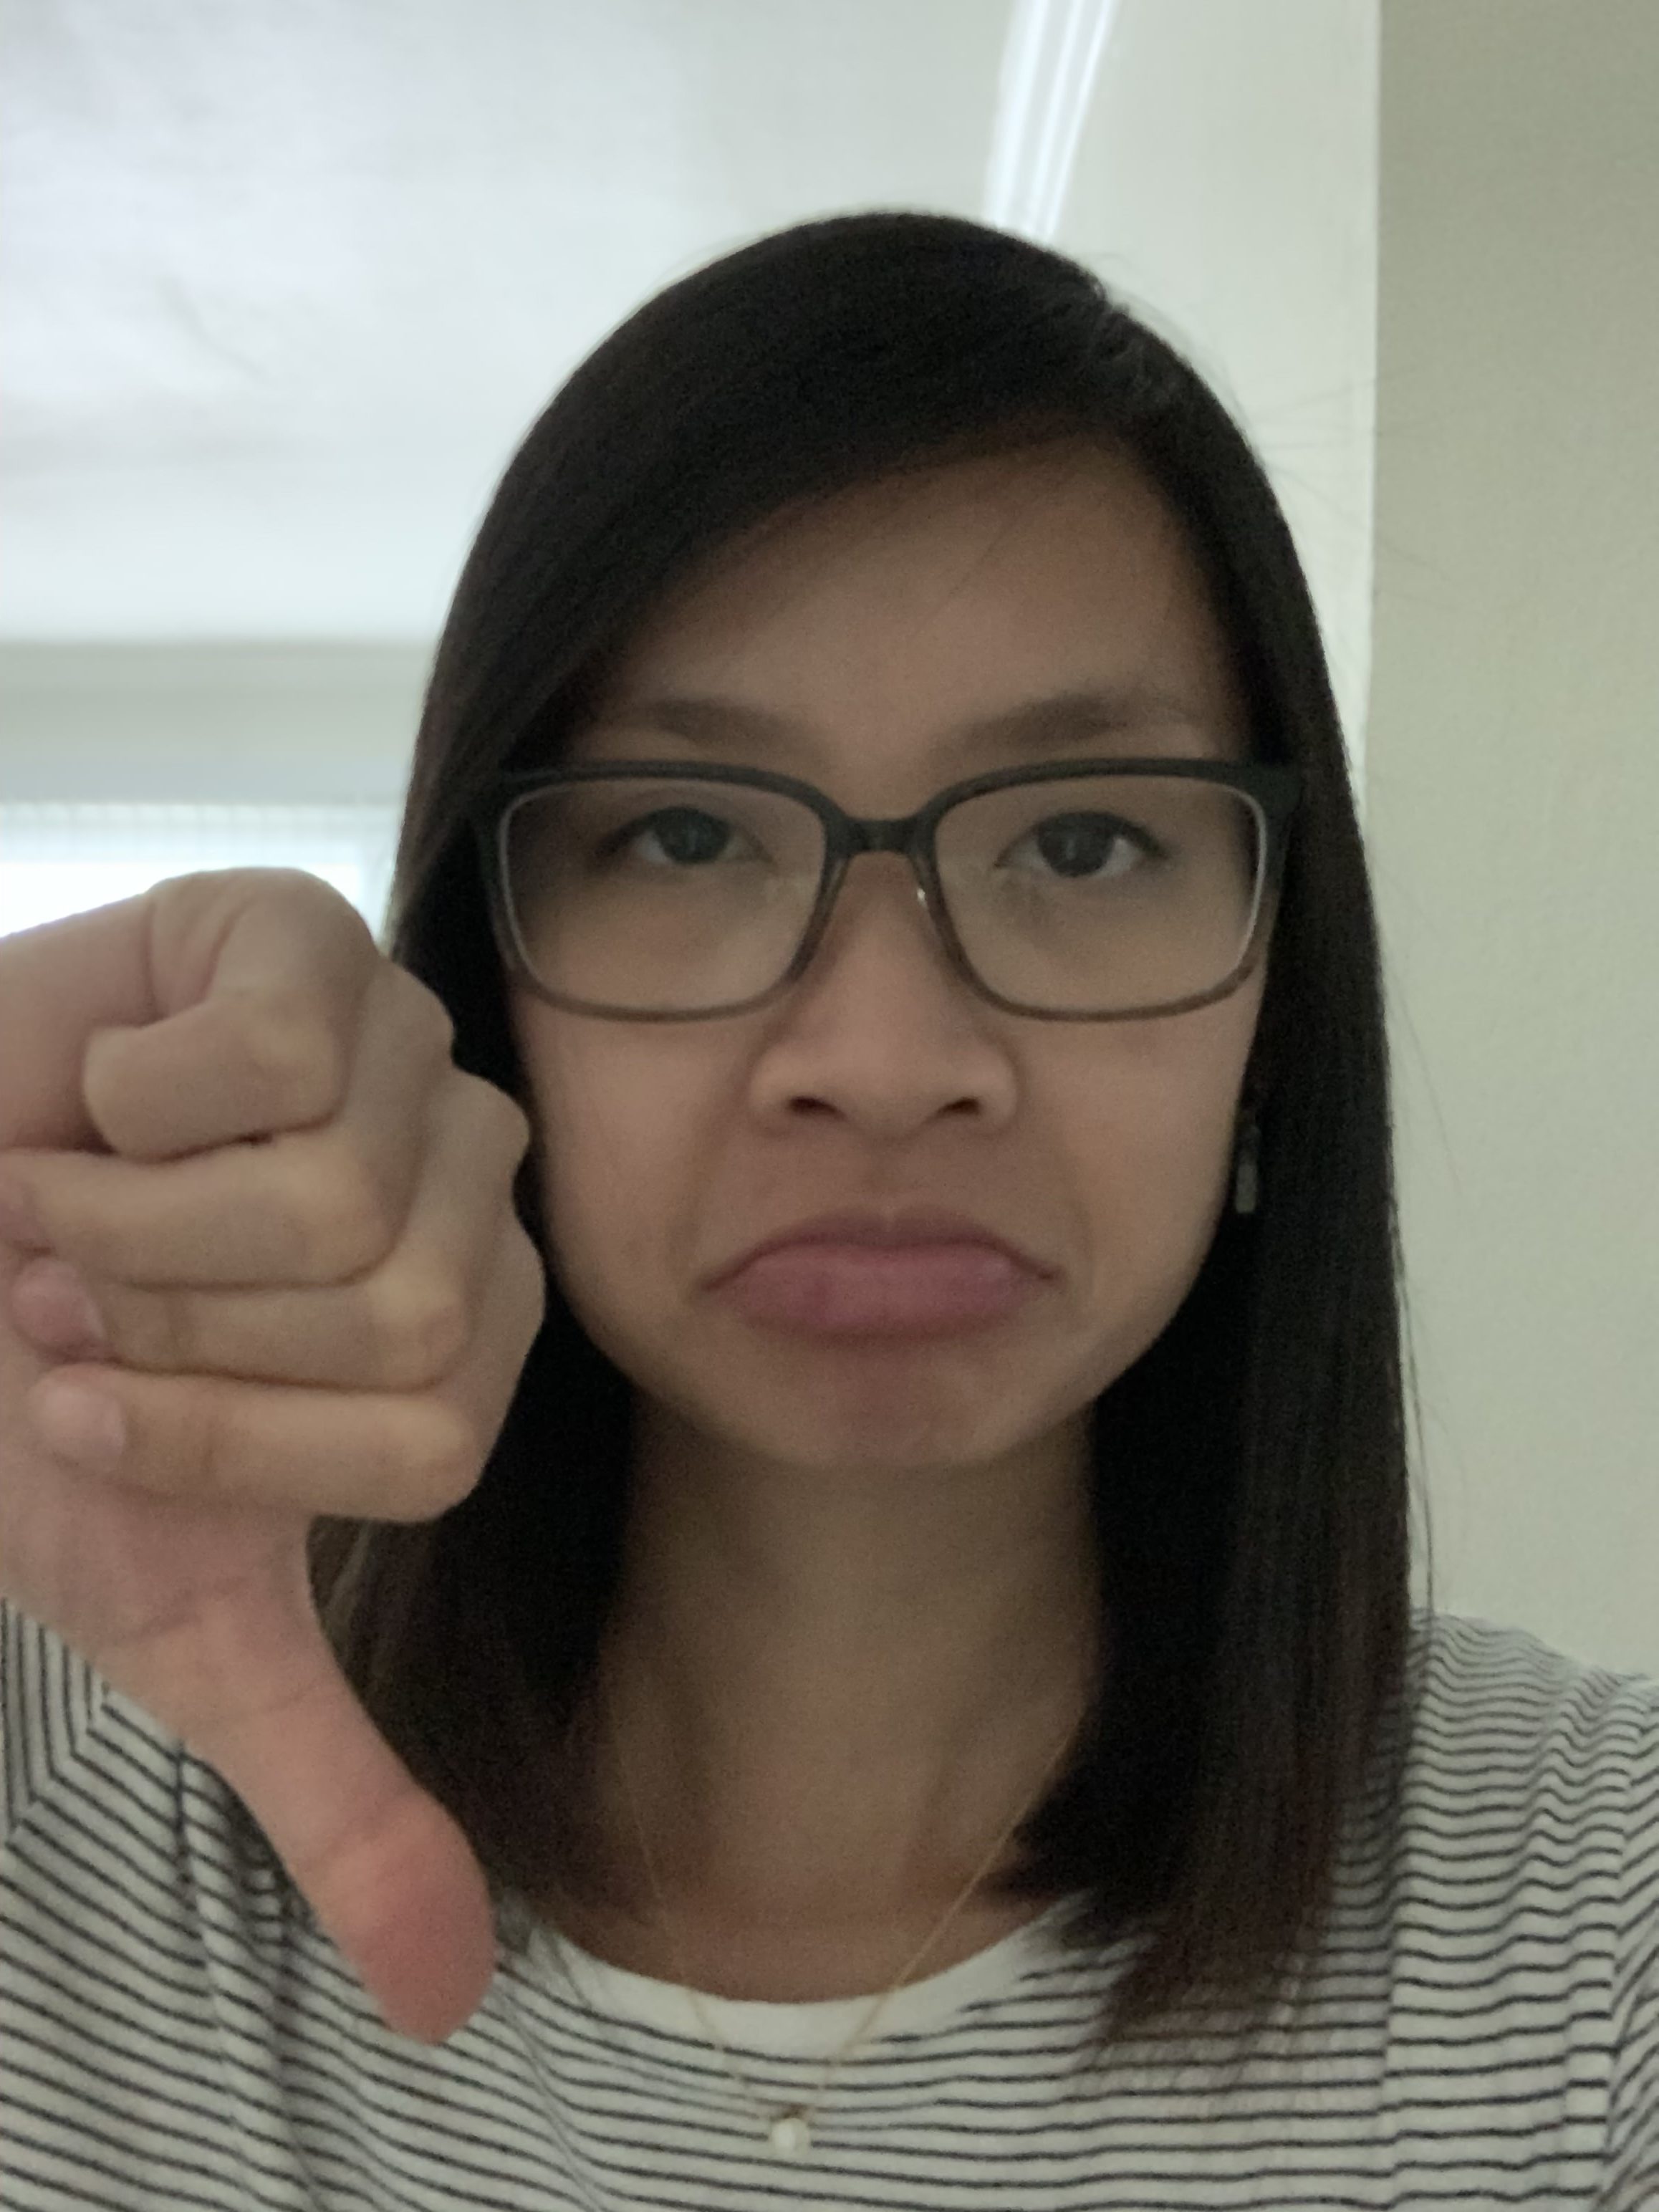
- Good light gives your eyes catchlights, aka the sparkle in your eyes. This really breathes life into a photo. The photo below is an example of no catchlights:
- Good light is white and doesn’t add any color tints. If you’re in a room with colored/painted walls, sometimes you’ll find that the color will reflect back into your skin. If you have green walls, you might find green tints in your skin.
Finding good light in your home
The easiest way to find good light in your home is to go to your window. If you don’t have windows in your home – don’t worry! Your tutorial is coming in part 2.
Once you’re at your window, you’ll want to stand directly parallel to it, and face it. This will likely be the best light in your home.
If you’re still not sure what the best spot in your home is, turn on your selfie cam, and spin all the way around. Note how the shadows on your face change as you move.
One thing to remember is that the light changes in your home throughout the day. I recommend taking a walkthrough of your home, and note the spots that look good in the morning vs. the afternoon.
Manipulating existing light
When you were doing your walkthrough, you may have come across a couple of different issues.
Issue #1: Light is too bright
If the existing light in your home is direct and too bright, you can diffuse it. This basically means putting something between you and your light source.
Pretend you have thin, white curtains – if you were to pull these shut, the light would immediately soften. You don’t have to have curtains to diffuse light, though. You can use bedsheets, aprons, towels, and more. I note a couple of different options in the IGTV video.
Issue #2: Light is too dim
When the light is too dim, this is when I like to use a reflector. So rather than diffusing light from the source, we are reflecting it back into the subject.
In the photo below, half of my face is dark. What I want to do is take that window light and reflect it to fill in the dark shadows on my face.

DIY Reflectors
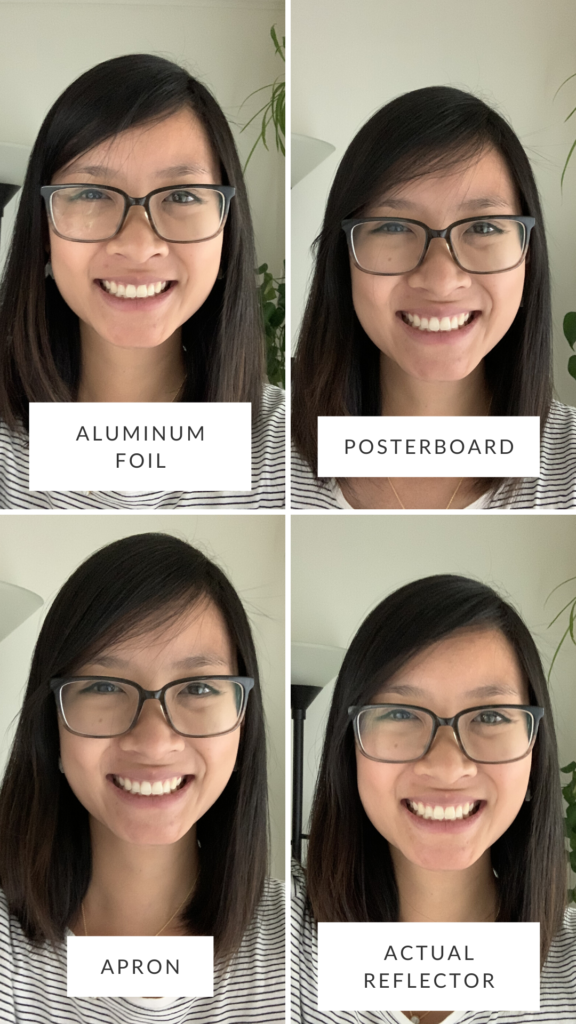
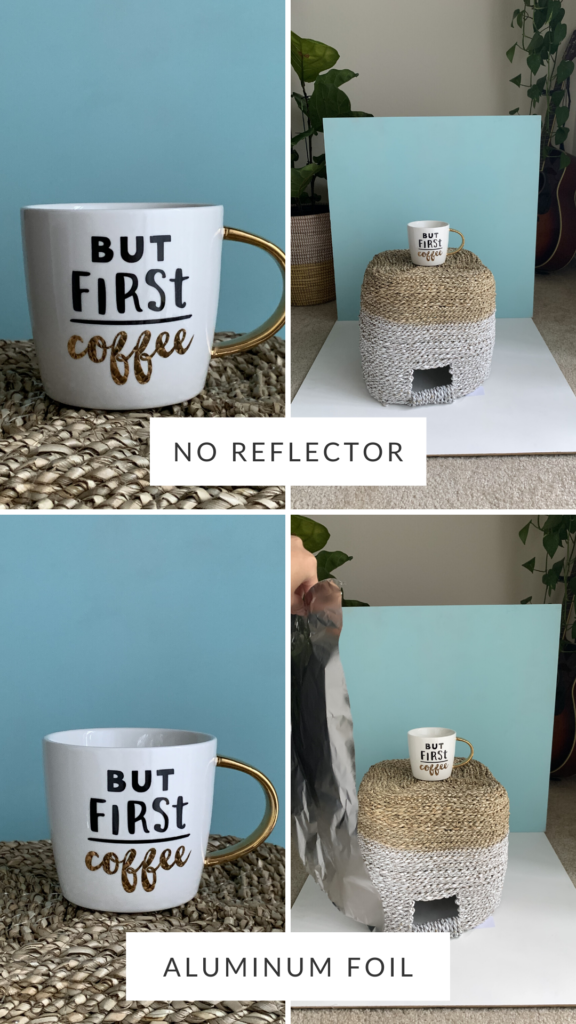
In the IGTV video, you can see a couple of different techniques I’m using. I have a reflector which bounces light around. Here are a few cheaper or DIY options that I like using:
- Mini reflector
- Aluminum foil – my favorite hack!
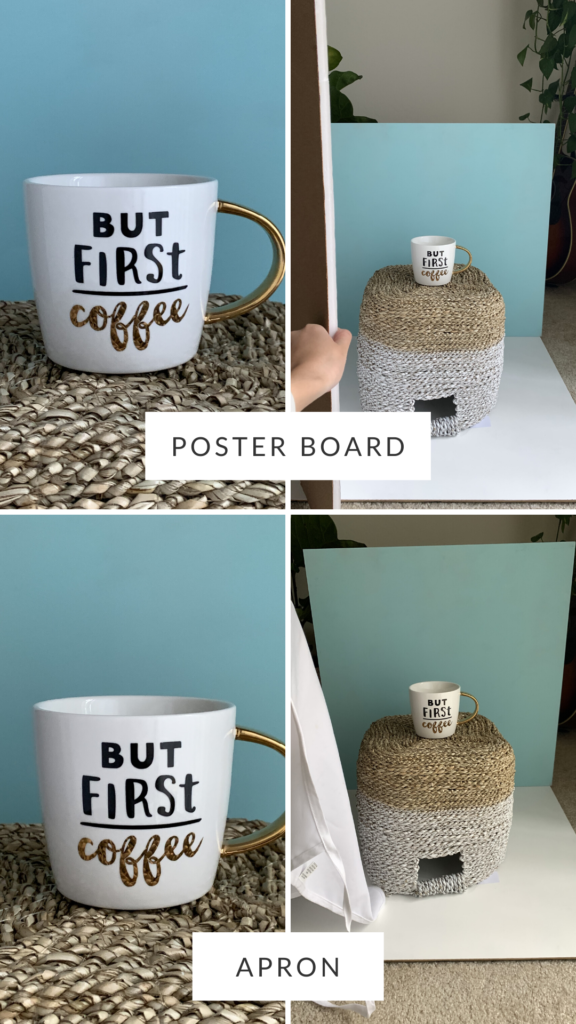
- White apron
- White pillow, cloth, towel, or bedsheet
- White Poster board
Positioning your reflector
Now that you have your DIY reflector, let’s talk about where to put it. In general, you’ll want to place your reflector at a 45 degree angle towards your subject.
Take this rule with a grain of salt. You might not always be at a 45 degree angle. I usually use this as a starting point, and then I move the reflector and watch how the light changes.
What you don’t want to do is put your reflector directly under your subject, as this causes the spooky flashlight look. We don’t want that!
And that’s a wrap on Part 1 of Indoor Lighting 101! If you have any questions about indoor lighting, leave them in the comments below. In Part 2, we’ll discuss how to create your own light that looks like natural light!
If you have any indoor lighting photography tips you’d like to share, leave them below!


[…] sure to read or watch Part 1 before reading this, because we’ll be building off concepts we learned […]
[…] Part 1: How to find & manipulate natural lightPart 2: Get a natural light look without natural light […]
[…] Use a reflector. Set up your scene next to a window and use a reflector to bounce light back into the scene. Not sure what a reflector is? Check out my Indoor Lighting series. […]
[…] promise. It’ll take a couple of hours, and you need to know a teeny, tiny bit about lighting, but the small amount of time it will take you to learn the basics will pay off […]