


In last week’s post, we talked about how to use and manipulate natural light. But, what if you don’t have natural light in your home? Well today, we’re solving this quarantine problem of yours by learning how to make artificial light look natural!
Part 1: How to find & manipulate natural light
Part 2: How to get a natural light look without natural light (you’re here!)
Part 3: How to edit bad light
Make sure to read or watch Part 1 before reading this, because we’ll be building off concepts we learned there.
IGTV Video
I recommend watching this for the best learning experience! It’s captioned, so you can still read if you want.
My Gear
Lights
Sunpak LED Ring Light, 12″ – what I have
Softbox Lighting Kit (set of 2 if you’re feeling like it)
Softbox Lighting Kit (just 1)
Yongnuo YN560 IV Speedlite + trigger + light stand (if you have a DSLR)
Modifiers
Godox 47″ umbrella – what I bring to shoots
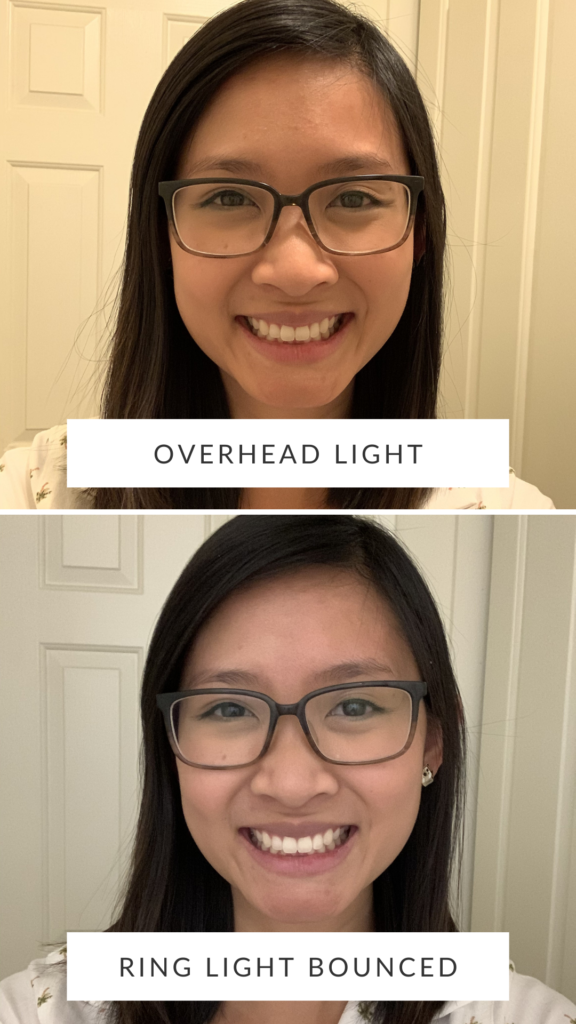
Technique #1: Bounce
Bounce is exactly that – you’re bouncing light off a reflector. In my case, I’m using my walls since they’re all white. If you have white walls or white ceilings, you’re in good shape – you can use the wall as your reflector. If you don’t have white walls, I recommend breaking out your reflector or DIY reflective surface.
In this example below, I’m in the darkest corner of my home. I’ve closed all the doors, so this is basically what my apartment would look like on a gloomy day or even at night.
Because I have white walls, I can use the walls as my reflector. If you don’t have white walls, this is when you’d use a reflector (towel, aluminum foil, etc.) and have it up and 45 degrees towards you. You can hang a towel on a door, or find another creative way to hang your reflector from the ceiling. To bounce your light, just point your flashlight at your reflector!
As you can see, the light is even, and there are no shadows. If I didn’t tell you I was using a flashlight, you might not know!
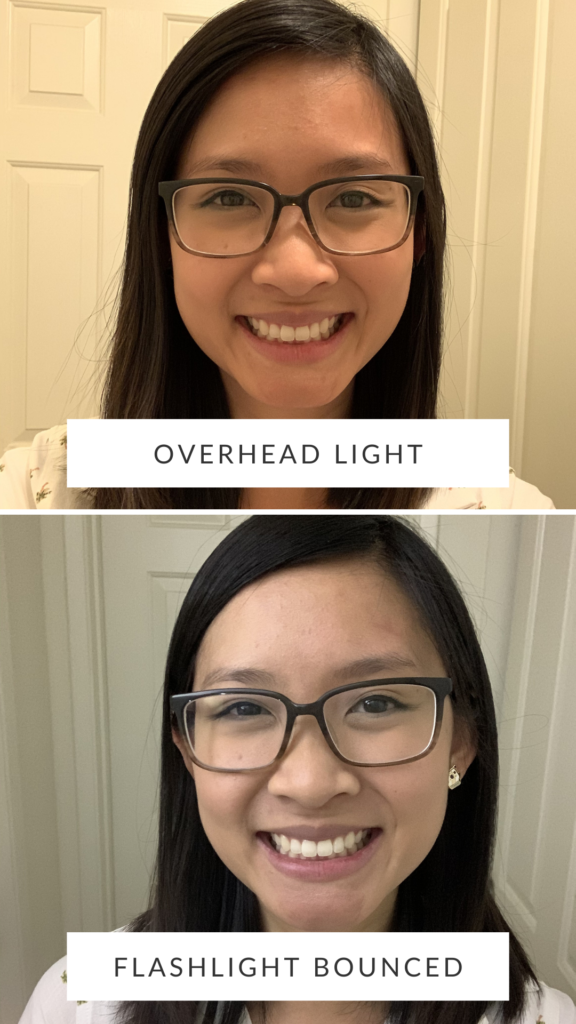
Here is the same example, but instead of pointing my flashlight at my reflector, I’m pointing my ring light.

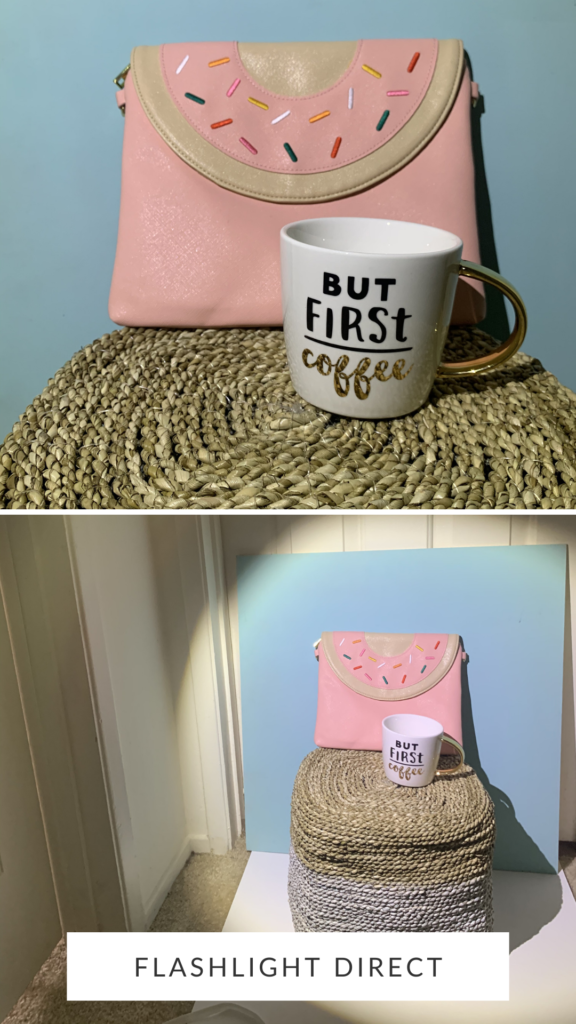
Technique #2: Direct & Diffused
This is my preferred method to create natural-looking artificial light if you DON’T have white walls in your home. If you have colored walls, you don’t want to bounce light, because that will give your skin an unsightly color tint.
In the example below, I’m pointing my ring light directly at me. Again, it’s pointing at me at a 45 degree angle, and is up above my head, mimicking where the sun would be. Depending on your light source, you may or may not need a diffuser. My ring light is very strong even on it’s lowest setting, and that’s why I throw my kitchen apron over it.
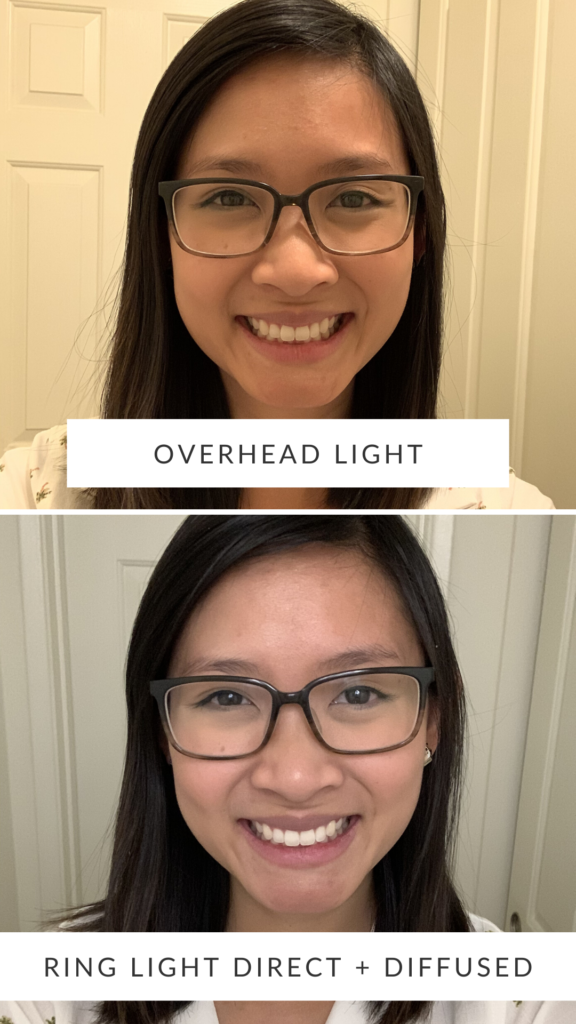
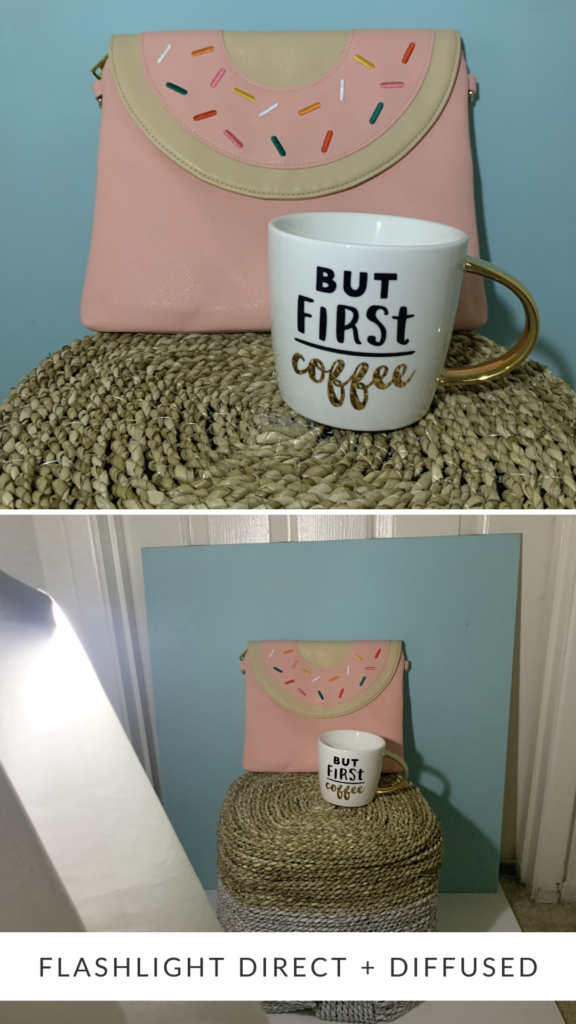
Just remember: as long as you have a light source, diffuser, and reflector, you can make any light look like natural light.


[…] 1: How to find & manipulate natural light (you’re here!)Part 2: How to get a natural light look without natural lightPart 3: How to edit bad […]
[…] 1: How to find & manipulate natural lightPart 2: Get a natural light look without natural lightPart 3: How to edit bad light (you’re […]
Do you recommend the Sunpak 12 in ring light specifically, or will any 12 in ring light work?
Hey Amy! Any ring light will work! I like the Sunpak one because you can control both the power and color temperature. Whatever brand you decide to get, as long as it has those same controls, you’ll be golden.
We just moved to a condo that is
North facing.
How can I emulate sunlight on patio & inside?